Monday, August 8, 2016

IITBS-- Cindy of Raspberry Sunshine Handbag Straps


Today's guest blogger is Cindy of Raspberry Sunshine.
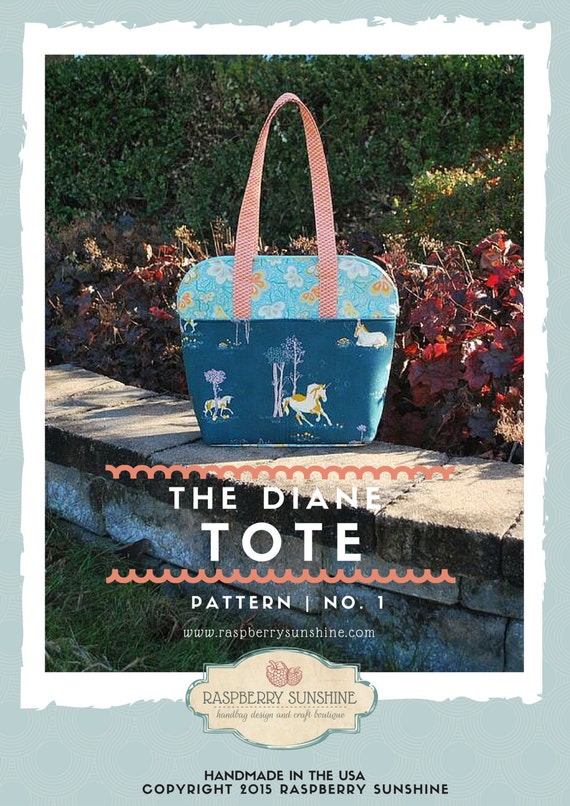
Cindy is an incredibly talented bag maker, bag designer, sewist and blogger. I met Cindy through pattern testing for Sew Sweetness and I have always been blown away by the incredibly gorgeous bag she makes. She has also designed her own bag pattern The Diane Tote:

Cindy's blog is a fantastic resource for all sewists, but especially fellow bag lovers. She offers various tutorials and helpful tricks to step up your bag game. 

In addition to designing and blogging, Cindy also has an Etsy shop that features fabrics and handcrafted bags for sale. 

You can find Cindy through her Blog, Facebook or Instagram. I'm so excited to have her joining us today!

...................................................................................................................................................................


To me, straps are one of the most important parts of a handbag.  Not only do they need to be comfortable enough to hold by hand, arm or shoulder, they will be carrying A LOT of your bag weight.  So making your straps long lasting is very important!

If you are following a well written pattern, the designer has (hopefully) included strap instruction best suited for the design.  But if you are drafting a pattern of your own or maybe want to go rogue and modify the straps in a pattern,  give these options a try!

** Tools I have on hand when making any sort of strap: Dead Blow Hammer (pounds the heck out of a thick area!) , Scrap Cloth (put down before hammering), Fabri-Tac, Iron, Clips.

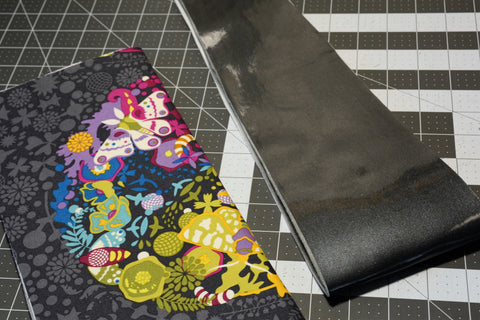
Fabric - One of the most popular methods of making straps at any skill level is what I call the double fold method.  This works best for most fabric types. The thinner to mid-weight fabrics will need a piece of fusible interfacing along with it ( I use SF101) to add stiffness. The thicker home decor or upholstery weights usually don’t.
To figure out finished width I take the finished width I want and multiply by 4”. Example: If you would like a 1″ strap, you need to cut your fabric 4″ wide.

  1. Fold length of fabric strip in half and press to create a fold line.
  2. Open fabric strip.  Take each long unfinished end and fold it towards the center and press.
  3. From step 3, fold in half lengthwise again and press.

From here, I typically stitch 1/8” from each end to finish, but a nice double stitching on each side or every 1/4” or so works great too!
Once you make a strap like this, you can attach it many ways.  Rivets, Grommets, Sewn into the bag itself, or sewn on top of the exterior. The possibilities are endless.

Below, I used a tab with a rectangle ring to attach my strap.  This is popular for cross body straps (On Left).  To avoid an unfinished look on my strap ends, I tucked each short end in 1/4” and pressed before I folded the fabric. From there I just loop it through the ring and stitch an “X” to finish it off.

Another very popular method of strap attachment is this type of tab (On right) This is sewn onto the front of your bag where the straps will go through the top of the ring and stitched or riveted to secure.

Go thrifting!  Yes,  some bags may be old and crusty, but that doesn’t mean their straps are!!  Take apart that old unused bag and reuse!  This option works best for vinyls, leather or webbing that can be easily cleaned up.  (Get the hardware too while you’re at it!!)
Webbing - Easy to purchase in most craft stores in a variety of sizes (the pic on the right is a 3pk belt from TJMAXX!), webbing is a great option for any bag that will be seeing a lot activity (Large totes, beach bags, backpacks, etc). I typically use a thicker cotton when I use webbing on handbags but the Poly and Nylon are great solid options. Note that most webbing will need some sort of fray-check, glue or fold under technique to seal edges.

Wooden -  These are harder to find, but I have seen many styles at our local JoAnn’s and online.  Unless your pattern includes how to attach these, wooden handles will require some sort of tab, hardware or fabric piece that will ultimately wrap around the  area then be stitched into the bag.

Leather -  Oh, how I love leather!!  If you’re looking for a classy and simple strap to use on your bag give leather a try!  You can sew it into the top of your bag or if you are comfortable with rivets, a double cap rivet (or two) can be used to secure it to your work.  Leather can be a bit stiff to work with, but softens as it ages.  

Straps can be purchased ready to use, or you can cut it to your desired length and width. How about that thrifting you did?   A nice softened leather belt can be cut down to make great straps too!

* WARNING!*  Practice before you sew.  Leather does not forgive.  Sew slow and take your time and if you can, practice with scraps before starting a big project.
Vinyls  

Vinyls of all sorts are the ‘big thing’ right now in handbag design.  Marine Vinyl, Glitter Vinyl, Upholstery Vinyl.  All are readily available online and in stores (Glitter is a little trickier!)  The success of vinyl products in your handbags depends on these :  Needle size, Thread size, Walking Foot or Roller Foot and thickness of vinyl.  

Your specific machine (instruction guide) will tell you what it needs for needles and feet, but when you sew with vinyl thread typically is a bit tougher and thicker.  Gutterman Upholstery Thread and Bonded Nylon tend to be my go-to, but your machine may require different.

* WARNING!*  Practice before you sew.  Leather does not forgive.  Sew slow and take your time and if you can, practice with scraps before starting a big project.

This is my go-to tutorial for vinyl straps. I’ve been using it for years and it never fails.


Thanks for stopping by today for the IITBS! I know many of you have used or seen these techniques, so do you have any tried and true tricks for strap construction? What is the most unique material you’ve used for straps?

IITBS-- Chris W Designs Giveaway


Today's giveaway is brought to you by Chris W Designs. Chris W Designs offers designer style handbag patterns that allow for easy customization and professional results. I have always been a huge fan of Christine's patterns and the details that go into each of her designs. 


Her wide variety of patterns fall into two categories of patterns; her "Easy Street" patterns are designed to be quick and easy sews that are perfect to whip up to sell for markets or last minute gifts. The patterns are designed to be shorter for those who don't need a long list of instructions to make a bag. The other patterns fall under her "core" range and these are great for those who love LOTS of visuals and step by steps and are more like an e-book than your typical PDF patterns. This is perfect for those who need a confidence boost, as although the directions may seem lengthy, they directions are broken down step by step in such a way you will be able to create something you may have never thought possible!

Check out some of Christine's amazing designs: 


The City Slicker comes in your choice of difficulty, the intermediate and advanced. You can buy either pattern from her shop, or buy the bundle and pick your fave.


The Gizmo garage is a unique take on your traditional laptop pattern and the pattern features 3 sizes designed to fit a variety of laptop sizes.


The Lunar collection was previously a featured pattern in the Bag of the Month Club but is now available as a stand alone pattern in Christine's shop. It comes in 3 sizes: small, medium and large. The small is perfect for your every day handbag and the large is great for a weekender or duffel bag. 

In addition to her amazing line of patterns, Christine is also a designer for the Bag of the month club, which is a super fun subscription in which you get a brand new pattern each month from 1 of 6 incredible designers. You can get more info here. Bag lovers should also check out Christine's blog for a ton of helpful hints, tutorials and resources for bag making. 

Now for the giveaway!!! One lucky winner will receive a 30 dollar shop credit for the Chris W Designs pattern shop. With such a variety of designer patterns, you will find some that are exactly what you are looking for!


a Rafflecopter giveaway

Sunday, August 7, 2016

IITBS-- Katherine of PfitzSewSwell Sewing Curves and a Bonus Trick forTurning


Our second guest blogger today is Katherine of PfitzSewSwell. I discovered Katherine on Instagram as fell in love with her use of color and her professional looking bags. I don't think I have seen a single bag with her that I have not been just blown away by. Seriously, see what I mean:


Katherine just launched her website and blog, and you can order one of her incredible creations if you'd like a handcrafted couture bag and don't fancy making your own. Go check out her new site and her Facebook page to see all of her stunning creations! 


Hey everyone! My name is Katherine, and I’m the Creative Mastermind behind PfitzSewSwell, where I make handcrafted couture that never fit so swell.
Let’s get one thing straight from the get-go.
I’m borderline obsessed with bag-making.
I learned to sew when I was a kid, but rekindled my love for it in February 2015. I searched Pinterest for HOURS trying to find the perfect cross-body bag, and finally found a pattern by Chris W Designs that I loved.
But then, I had to make another bag. And then another, and another. Finally, I decided I could turn my passion into a business!
Now, I get to sew custom, one-of-a-kind bags for others on a daily basis and I’m fortunate enough to test bag patterns for Chris W Designs and Cloudsplitter Bags & Designs.
So...sewing curves.
Does that intimidate you?
It did for me, for a long time.
You see, I have this way of overthinking EVERY. Single. Step. In a pattern.
I used to spend literally hours on ONE bag’s bottom or side gussets.
Now, I can finish in just a couple minutes.
What?! How can you do that?!
Well, let me share with you some of my favorite tips below! :)
#1: What the heck is a convex and a concave curve?
I thought about how to best explain this, and I think the alphabet is a simple example you should be able to remember.
The letter "m" has TWO convex curves in it. See them? Yep, I thought so!
The letter "w" has TWO concave curves in it. (You’re like, thanks, Captain Obvious! insert eye-roll here)
But, to make things super simple, I've included a picture for all you visual learners!
Now that we know about types of curves, what’s next?
This is SOOO easy, you guys, and I don’t know why I didn’t think of it sooner.
#2: Mark your seam lines before you do anything else to the pattern pieces!
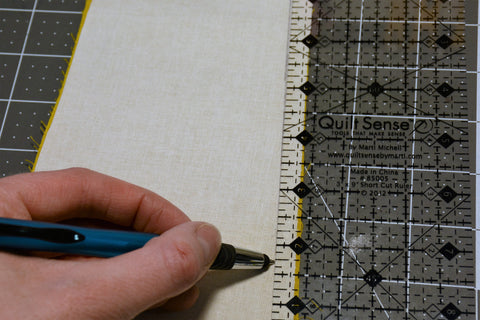
I use my handy-dandy 3” by 9” quilting ruler to mark every couple of inches around the curve. Then, I connect them by rotating my ruler as I draw the line on. I typically cheat by using a regular ballpoint pen for this, but make sure it’s a light color that won’t be seen on the other side. There have been too many times I’ve used another type of pen or marker, only to see it’s disappeared after all my hard work! And it isn’t fun to redo it at all.
So, do this on both the convex and concave curves you’ve got, okay?
Up next, we’ve got the all-important stitch length!
Wait, this can make a difference? Heck yes!
#3: SHORTEN your stitch length before sewing a curve.
Before you even start to sew the curve—like when you’re leading up to it—shorten your stitch length to about a 2 or 3. This will create more stitches (duh!), strengthen your seam around the curve, and hopefully prevent you from having to rip everything out and try again (which I’ve done. MANY. Times. Not fun.).
#4: Match up key points on each pattern piece, easing the fabric to get nice and close to the other pattern piece.
This is one step I’ve overthought again and again. Here are a couple points to remember:
  1. Find the centers of your pattern pieces by folding wrong sides together and pressing. For vinyl, leather, and all fabrics that might melt to your iron (no, no, I’ve never done that! ;)) use a seam roll, the blunt edge of a ruler, or finger press.
    1. Match up your centers (always do this first), then match up the top edges if you’re sewing on a gusset, or the opposite corners if you’re sewing an ovular or circular base. The curves will ease more equally, and your bag will look way more professional!
    1. Because convex (“m” curves) naturally have more fabric, they’re going to be wont to pucker. So, as you're easing the curve, make sure the seam lines you drew earlier match!
    I repeat: the raw edges of your pattern pieces do NOT have to perfectly line up! Your seam lines are where the fabric is joined, and is what counts when making a super smooth curve.
    We’re lucky enough, as a community, to be located all over the world. This means that our seam allowances differ quite a bit in size. Here’s the bottom line:
    #5: The greater the seam allowance, the more likely you are to get puckers in those beautiful curves.
    I have two tips to help prevent this puckering:
    • Consider trimming your seam allowance down some so that you have less fabric to work with. I trim my seams to ¼” before I match them up, and have much better luck when sewing.
    • Because one curve (the "m" curve) has more fabric, I use my pinking shears to cut at the very edge of the raw edges to allow some more easing into the curves. Rather than trimming slits in one curve and cutting out slits in the other curve, I use the pinking shears on both curves put together.
    Now, it’s time to match up the curves and sew them together! YAY!
    #6: As I see it, there are four ways to match up curves and sew them together.
    I’ve tried them all and I have two favorite methods.
    • Eyeballing it and holding the fabric together with my fingers as I sew around
    This one I do not recommend. I always end up with tons of puckers and uneven fabric. Not. Good.
    • Using pins to hold fabric together
    This can be useful. Sometimes. But more often than not, I prick myself with the dang pins, and then I have a far worse problem on my hands than before! My machine’s needle has also been known to hit a pin and bend it, which means I have to throw it away. So I (for the most part) steer away from using pins in my day-to-day sewing.
    MY TWO FAVORITE METHODS—I know you’ve all been on the edge of your seat in anticipation of these tips!
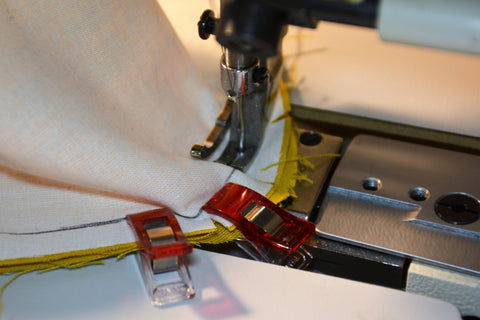
    • I use the ever-amazing Wonder Clips for EVERYTHING. They are sooo great because I can’t manage to hurt myself with them, nor do I have to throw them away. They’ve got little measurement guides that come with the packaging so you can even use them to accurately measure your seam allowance!
    Have you ever seen something like this?
    That used to be me. But now, I’ve sewn enough to know that I need to give my machine a chance to sew some stitches in between the clips. I space them every couple of inches, and readjust as need-be while I’m stitching.
    • I can’t remember where this idea stemmed from, but it is pure genius.
    Hold your pattern pieces together using staples!
    Excuse me, Katherine, but did you just say staples?
    I sure did! And yes, this method can be a little more time-consuming than others at first, but eventually, you’ll find the right combination of steps to work for you and will be whizzing along in no time.
    How do I do this? Simple. I find a stapler with a long neck, then, after I’ve matched up my fabric with a few clips, I staple within the seam allowance every couple inches. Mostly, I sew with a pretty small seam allowance, so after I’ve sewn the pieces together, I will use a handy-dandy staple remover tool like this one to remove all my staples.
    Some people use a ½” seam allowance and then trim off the staples after they’ve sewn the seam. But, my staples are never ever in a perfectly straight line, so I prefer to take them out afterward. Personal choice, but you can do as you like!
    Now, we get to talk about the actual sewing part. Thank goodness!
      #7: I cannot stress this enough: when you’re sewing curves, make sure to take them slowly!
      I know it’s tempting to sew through as quickly as you possibly can to get done with the dreaded curves. I’ve done it a million times. But then, I’ve found that a seam isn’t lying as smoothly as I would have liked and I have to back-track and rip everything out. So. Annoying!
      Instead, I take the curves nice and slowly, and hand-crank my hand-wheel one stitch at a time, manually. This means I use no power from my foot pedal, but allow my hand to give me the ultimate control of ensuring each stitch goes exactly where I want it, the first time!
      That wasn’t so bad, now, was it?
      #8: All about turning right side out!
      When you turn your curve right side out, make sure to double-check that you’ve caught all the fabric in the seam, and stitch over it a second time if you feel it’s necessary or it’s on a high-stress point of the bag. If you see any puckers, make sure to address them right away. There’s nothing worse than having a beautifully completed bag, only to realize that you have the raw edges of some exterior fabric pulling away at the curved corner of your gusset.
      #9: A little shout-out to Margareth from the first day of this amazing blog series for the last step. I HIGHLY recommend checking out her guest post about pressing for a professional finish—this applies to curves, and I couldn’t have explained it any better myself!
      PHEW! Those are a lot of tips! You can see that, through applying these tips, I’ve successfully completed my bag, the Amalfi Hobo Bag, a PfitzSewSwell Original design! Doesn’t it look professionally done and fabulous??
      But wait…there’s more!
      I’m sharing a bonus tip today, too! It’s about an alternate method to turning (or birthing) your bag right side out.
      Typically, patterns instruct you to leave a portion of the seam unsewn in your lining fabric. Then, you use the (in my opinion, always too tiny) hole in the lining to turn the entire bag right side out and press the seam allowances toward the wrong side of the bag.
      If that weren’t enough already, you need to pin the edges together, making sure no raw edges show, then either slip-stitch it by hand or edge-stitch it using your machine. For myself, I never get the seam right on the first try, and have to rip things out to try again.
      Which was a big pain. Until now.
      Recently, I started to hear about the idea of an alternate way for turning bags. And it turns out huge companies manufacturing bags have been using this method all along.
      It’s not hard to do, and I don’t know why I didn’t think of it sooner.
      Turn your bag right side out through an interior zipper pocket!!!
      This is SOOO easy it’s ridiculous. And you can make the turning hole as wide as your zipper pocket will allow!
      I’ve seen it done a couple of different ways. Either way, you sew a standard zipper pocket into the lining.
      Sometimes, the zipper pocket panel fabric is:
      • one long piece, and other times, it’s
      • two smaller pieces that you sew together.
      If you use one long piece, sew the zipper pocket as you normally would, and then just trim off the VERY bottom of the pocket, creating a hole in the bottom of the pocket..
      If you use two smaller pieces, you should have a built-in hole already.
      MAKE SURE TO COMPLETELY UNZIP THE ZIPPER POCKET ALL THE WAY!
      This is where I have a special trick to make sure that your seam to close up the zipper pocket is as neat as possible.
      I am obsessed with this tape. I found it at Tandy Leather, and it is seriously sticky (way more so than Wonder Tape, which I love, too.). I do not recommend sewing through it directly as it will gunk up your needle (speaking from personal experience, again!)
      I use the 3/16” tape on the wrong side raw edge of each piece of the pocket I’ve got in front of me. Then, I fold the fabric + tape back to create a finished edge. I do this for both sides.
      Then, carefully, turn your bag by pulling the exterior of the bag toward you through the zipper pocket. Eventually, you should get all of the bag through and be able to smooth it out!
      When you’ve double-checked that everything is as it should be, simply take the two finished edges at the bottom of your zipper pocket, match them up (which shouldn’t be hard because you’ve got your edges neatly finished), and edge-stitch the pocket.
      Why is this genius?
      Because your turning hole hides at the bottom of that pocket, where no one ever looks. It looks great because of the raw edges hidden neatly away and your bag lining is perfectly sewn and unripped since you didn’t have to turn through the lining.
      Isn’t that amazing?! I sure think so!
      Well, it’s been an honor to guest blog about two of my newfound favorite parts of bag-making! I hope you’ve either learned something or had something explained in a new and different way. In any case, I hope you find this post to be useful and helpful for you.
      Now comes some exciting news on my part…I have just re-launched my website over at PfitzSewSwell.com. As this is launch weekend, I have some pretty fancy deals and am doing a giveaway for my one of my bags! If you want to be in the running, make sure to stop by my page for more details…you won’t regret it!
      You can also find me on:
      Facebook at: http://www.facebook.com/PfitzSewSwell
      Instagram at @pfitzsewswell
      Twitter at @pfitzsewswell
      Thanks, everyone, and sew on and sew forth! (Get what I did there?...I do love a good pun!)
      :)
      --Katherine

        IITBS--Reece of Happy Okapi Tools & Notions for Bag Making


        Today's post is brought to you by Reece of Happy Okapi. Reece always is sewing up the most incredible projects and gorgeous bags. Follow her on Instagram if you are feeling a need for some inspiration and/or bag love!

        I love seeing all the amazing bags she creates, and how perfect they all are. Check out this adorable Maker's Tote she just posted:


        And this Tortoise Bag she made as a tester....just stunning!


        The Harriet Expandable Tote:


        Her stunning version of the Sandra Saddle Bag:


        In addition to all the bag yumminess, Reece has an amazing blog filled with fun sew alongs, pattern reviews and tutorials. Go check her out on Facebook too!


        ...................................................................................................................................................................

        There are so many tools and notions in the sewing world, it can be hard to navigate them all. When I first started sewing, about 5 years ago, I didn’t have any fancy tools, just one of those inexpensive kits you get from craft stores. You know the ones, they usually come in a clear vinyl bag with a few hand needles, some shears, some pins, a measuring tape and gauge, they’re usually a marginal step above a hotel room sewing kit. I still use that measuring tape occasionally and never bothered upgrading the measuring gauge. Over time, I got frustrated not having the right tools, so I slowly built up my tool stash to what I have today.  I don’t pretend to be an expert on them all, but I’d love to share my list of favorites and essentials with you.


        Basics: these are the basic tools that I use with practically every project and likely wouldn’t start a project unless I had these on hand.


        Quilting rulers, rotary cutter and cutting mat.
        With this combination, you can quickly and accurately cut large pieces of fabric and interfacing.
        My advice is to buy yourself the largest cutting mat you can afford and have space for. You can often find them on sale or use those 50% off one item coupons for a cutting mat, making it really reasonable.
        For the rotary cutter, it really depends on what type of fabric you’re using and the size of your pieces you’re cutting. I use a lot of thicker stabilizers and only use my rotary cutter to cut straight lines, so a larger cutter (60mm blade) works well for me. If you want to be cutting smaller pieces or going around curves more, a smaller blade (18-27mm) would work for that. If you’re just starting out and just want to purchase one, you can try the 45mm blade for the best of both worlds.
        The acrylic quilting rulers are the straight edge you cut along, and also a way to measure your cuts accurately. When I started out, I only had one ruler: 6” x 24” and it worked quite well. When I was able to invest a bit more, I purchased a 6.5” square and a 12.5” square and they both made it a bit easier for smaller and larger cuts. In hindsight, I wish I had purchased a ruler package for better value. There’s also this kit that would be great for people starting out.
        olfa kit.jpg


        Scissors
        I use the rotary cutter for all my straight cuts, but for curved pattern pieces, I like to use fabric scissors. When I first started out, I bought myself a decent pair of Fiskars fabric shears, but recently I bought some gorgeous 8” Tula Pink Fabric Shears and I noticed a difference right away in quality, I love them! I also have cheap scissors I use for non-woven interfacing/stabilizers and cutting out paper patterns. I’ve used several small snips for threads and I’m really happy with my small gingher embroidery scissors. So in case you’ve lost count, that’s three pairs of scissors I recommend: good quality fabric shears, cheap shears for paper and interfacing, and small scissors for threads.


        Wonder Clips
        I bought a set of Wonder Clips when I first started bag-making and I never looked back. I find they work so well with layers and you don’t have to worry about pin holes on vinyl/leather. I do have pins but I rarely use them, because I prefer not to jab myself with pointy objects if I can avoid it. I’ve heard that some people have bought cheaper clips and they end up breaking, so I recommend saving yourself the headache and just going with the better quality clips.
        wonder clips.jpg


        Seam Ripper
        I know, I know, we don’t want to have to rip out those seams, but sometimes, we just have to face the music, and we may as well have the right tool for the job. I really like the Dritz Seam-Fix Seam Ripper because it has a rubber head that helps remove all the little threads and then close up the teeny holes from the erroneous stitching. My seam ripper also does double duty for making holes to insert magnetic snaps and bag locks.


        seam ripper.jpg


        Nice To Have: I use these often, and they make projects go smoothly


        Markers
        There are so many different marking tools out there and I think at the end of the day it really just comes down to personal preference. I rotate between a few, depending on the type of fabric I’m marking and what process of the bag I’m at. For basic outlining of pattern pieces, I just grab whatever I have in a colour that’s going to show up, since my outline won’t be seen on my finished product. For marking placement, of an overlay or pocket for example, I use either Fons and Porter Mechanical Fabric Pencil, or Chaco Liners.

        fonsandporter.jpgChacoLiners.jpg


        Wonder Tape
        I almost counted this one as essential, because I use it for every single zipper. I buy the ¼” and it fits perfectly for zipper installs. I also use it when doing some finicky applique or reverse applique. This tape is double-sided and repositionable, so you can set your project up perfectly before you sew it. Unlike some tapes, this one can be sewn through and won’t gum up the needle.
        wonder tape.jpg


        Glue
        I use Beacon’s Fabri-tac from time to time. I use it to position handle connectors before I sew them in place, and I also use it as additional security when installing hardware. There are other brands, like E6000, which some people swear by. Fabri-tac was easy for me to find locally and I was happy with it, so I haven’t tried many others.


        Fray check
        This product can be a life saver if you accidentally nick your nearly finished product. Just dab it on and let it dry and it will prevent your woven fabrics from fraying. It’s a good idea to seal up the slots that get cut during some hardware installation as well.


        Point turner/Turning tool
        Something like this Point 2 Point Turner from Clover is really handy to have. I use the larger edge to help flatten down vinyl handles, and roll out curved seams. The pointy end helps when turning and making nice sharp corners. You can find many similar tools, such as a bamboo turner or some hera markers. If you’re really in a bind, a wooden chopstick helps too.
        turner.jpg


        Lint Roller
        Probably not what you expected to see here, right? Well, I use mine all the time. I find after snipping threads or tiny scraps sticking to my bags, a good roll of the lint roller takes care of all that. I also find it to be the best way to clean up the aftermath of a large seam ripping.


        Tablet/Laptop
        The vast majority of the projects I sew are from PDF patterns. I only print out the pattern pieces and follow the instructions on my iPad. I love being able to save paper and it helps me avoid clutter from too many patterns (I have lots!). I also like being able to zoom in on diagrams or images if I’m stuck on a particular step.


        Extras: these aren’t essential, but I find they make the process much more enjoyable, they’re even fun to use!


        Stiletto
        I first found out about this tool watching a Craftsy class. It’s used to help get really close to the needle and help guide fabric without getting your fingers sewn. I mean, that’s not the official description, but that’s what they really want to say. I found this 4-in-1 tool and I really love the flat end and now often use it in when I’m finger pressing.
        stiletto.jpg


        Thread Cutterz Ring


        I tried this ring when it first came out and I really enjoy using it. My machine doesn’t have a thread cutter, so this ring keeps me from fumbling around for my small snips while I’m at the machine.


        IMG_20150527_091501.jpg


        Wishlist: my personal wishlist of tools I’d like but can live without, for now.


        Steam Press
        I’d love a steam press. For now I just use a basic iron, and it does the trick, but when I’m doing large amounts of fusing, I daydream of having a steam press to cut down on the time spent.


        Duck-Bill Scissors
        I also learned about these in a Craftsy class, and that they’re helpful for trimming away only specific fabrics in a seam allowance, for example, trimming the foam, but leaving the fabric.


        That’s my list! Did I pick your favorite? Do you have a tool you absolutely must use with every bag that isn’t on my list? Let us know!


        IITBS-- Mrs.H Giveaway and Coupon Code


        Today's giveaway sponsor is Sewing Patterns by Mrs. H. Samantha is the creative genius behind the blog and pattern designs. Mrs. H patterns are clear, easy to follow and will empower you to take your bag making skills to the next level. The pattern collection ranges from beginner to advanced and there is a wide variety of styles to choose from. 

        In July there was a sew a long for the Reversible Hobo Bag, and is a GREAT reference to get you going on this versatile bag! 


        Some of my favorites from the Mrs. H shop:


        The Nappy Bag is a bag designed to be functional and stylish for modern moms. The inside of this bag boasts lots of pockets and two carrying options make this ideal for both a diaper bag and an overnight bag.


        The Backpack Bag is designed to be ideal to carry on the go. This adaptable bag has three different types of strap, making it readily adjustable to your needs - backpack straps, top handles, and a detachable shoulder strap.


        Samantha is also a contributor to the Bag of the Month Club, which is a subscription that gives you a new pattern each month from one of 6 incredibly talented bag designers. During the last subscription, the Window Shopper Tote was released: 


        The current month's bag is the Swim and Gym bag by Mrs. H:


        In addition to designing patterns, Samantha also has a blog that is full of helpful tips, tutorials and resources for both bag makers and all sewists. 

        In addition to offering one lucky winner their choice of 3 pdf patterns from the pattern shop, Samantha has graciously offered a coupon code for the series!!! Use code: MAKINGBETTERBAGS for 25% off your purchase, now through September 5th, don't wait to get the patterns you've been wanting to make!


        a Rafflecopter giveaway