Thursday, August 4, 2016

IITBS-Bree of My Crafty Crap Zip Tips


Today's guest blogger is Bree of My Crafty Crap. I met Bree through pattern testing for Sara of Sew Sweetness and then I started stalking her Instagram feed to see all the amazing bags she has made (she knows I stalk her so it's ok). She always floors me with the quality of bags of all types she creates! She is truly a bag making guru! I'm so exciting that she will be joining us today to share all of her zip tips!  Check out some of the incredible bags she has made: 


Thanks for having me today, Cyndi!  Bree here from My Crafty Crap, I’m so excited to be sharing for such a wonderful series.  I’m going to share some of my favorite tips & tricks that help me get great results, some tools that have changed my life, and a few of my favorite zipper tutorials.

The first thing you need to remember about working with zippers, is that you absolutely can do it!  Yes, they can be intimidating, there are so many tutorials and types of zippers out there, it can be hard to know where to start.  But don’t be afraid!  The most important things are to be patient, take your time, and practice!

So let’s talk zippers!  There are so many different kinds and sizes of zippers to choose from, it can be a bit overwhelming.  Here’s a great description of the different types of zippers and other general info from Sew Mama Sew: A Guide to Zippers.  

Some people prefer the look and feel of metal zippers, but personally I prefer nylon since they can be easily shortened (but don’t use your good scissors!  Ask me how I know…) and sewn over (just take it slow!).  I like to keep a few on hand at all times (those of you who know me might know that “a few” actually means 100+…I just love having the perfect choice on hand & not stalling a project to wait for hardware!) in a variety of styles, length, and colors.  Personally I mostly buy 18” and 24”, since a lot of bags need long zips and I always save the pieces I cut off if they are more than a few inches long.  You can buy new sliders & pop them on the piece you cut off and get two zips for the price of one.  Dog Under My Desk has a great video for reattaching a slider to the zipper tape if you are making a second zipper, or just accidentally pull off the one you’re using.  I wish I had found this video a long time ago, I threw away so many zips I thought I had ruined by cutting off the excess before moving the slider (but it so much easier to cut when it’s zipped closed…lol…) or accidentally zipped it right off the edge before sewing a new stop.

A note about buying new sliders & attaching them to your cut off pieces – you have to be careful to make sure you are getting the same size/style/brand of slider that is made for the zip tape.  YKK sliders won’t work on Coats & Clark zippers & vice versa.  I get pretty much all my zippers from Zipit Zippers on Etsy (I’m not getting paid to say that, I just really love their selection!) and she has recently started carrying sliders (zipper heads) for both #3 all purpose zips as well as the #5 handbag zippers.  I’ve found it’s also fun to mix & match colors this way like I did on these sunglasses cases.


My favorite, and maybe a little unconventional, tools when it comes to working with zippers are Dritz Wonder Tape and the Clover Fabric Folding Pen (both available on Amazon as well as craft stores & some Walmarts).  Seriously, sometimes I’m not sure how I sewed before I got these two.  

I now use the Wonder Tape in place of pin basting for so many things, but especially when holding zippers in place before sewing them in.  Even with lots of pins, zippers & fabric (especially if it isn’t interfaced) will still shift and stretch ever so slightly.  It may not seem like much, but even a little bit can cause problems down the road and leave you with a wavy zipper.  Nobody likes wavy zippers!

I probably had the Clover Fabric Folding Pen in my Amazon cart for a year before I finally ordered it, but I wish I had gotten it so much earlier!  I can’t remember where I first saw it, but while it’s geared more towards quilters, I quickly realized it’s indispensible to my bag making.  I use it for folding over small edges on labels or zip ends, which keeps me from constantly burning my fingers.  It’s great for folding in your seam allowance on the opening left for turning out a bag (I usually run it along the stitching line, then user Wonder Clips to hold it in place until the solution dries, or hit it with an iron to set it quickly.  If you turn your bag while it’s still wet, it can cause the fabric to stretch along the line & not fit as nicely), or folding down a seam allowance if you are inserting a lining by just dropping it in to the exterior.  

By far though, my favorite use is to get a perfect (or as close to perfect as you can get) opening for a inset zipper pocket.  How many times have you cut & pressed that opening, but still had scrunchy corners (technical terms here!) or too much of the facing showing or it pulls down the top edge?  I have found that by using the Fabric Folding pen along the stitch line after sewing around the box (on both sides), I am able to get the window to turn out much nicer & more flat, with hardly any of the facing piece showing.  Just finger press to get the facing turned out so it’s showing as little as possible from the right side, then press with a hot iron to set.  

Here I have traced over the pink pen line with the Fabric Folding Pen


The right side of the bag panel after pressing the facing to the wrong side.  No puckers or pulling edges!

And here is the facing on the wrong side of the bag panel.  You can see there is a tiny bit of pulling in the corners of the facing, but they won’t be visible.

Personally, I prefer to have the edges my zipper tape hidden on inset zipper pockets.  I think they look nicer and more professional.  This is a pretty good tutorial from Ikatbag for making an inset zipper pocket (sometimes called a welt pocket).  I’ll be honest, it took me a long time to figure out the easiest way to do this without causing a lot of extra work, still be held securely at the top of the pocket (I hate it when the weight of what’s in the pocket pulls down on the top), and have a continuous line of stitching around the outside of the zipper opening.  I have found that by sewing the pocket pieces to the zipper prior to stitching it in really adds no extra time, but makes for a much nicer finish, and it’s easier to stitching them on first rather than trying to do it once the zipper is attached to the bag.  Simply sew your pieces on to each edge of the wrong side of the zipper tape, so that the fabric pieces are right side together.  

Right side of the zipper, wrong side of the pocket fabric.
Wrong side of the zipper, right side of the pocket fabric.

The easiest way to remember how/where they need to go is to just imagine the pocket you are trying to create.  The right side of the zipper will be against the wrong side of the bag lining and you want the right side of your pocket fabric showing when you reach into the zipper pocket.  After sewing the pocket pieces to the zipper, use a couple pieces of wonder tape or glue baste your zipper under the opening, make sure the pocket pieces are pulled out of the way, then stitch all the way around the opening, making sure to move the zipper pull when you get to it so you can have a nice, even line of stitches.  Then just sew up the sides and bottom of your pocket (I always round off the bottom corners to keep things from getting stuck down there).

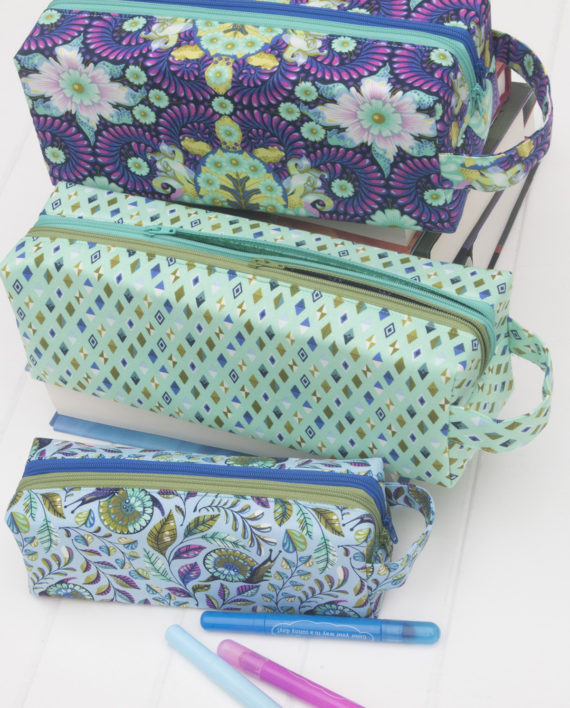
I wrote this tutorial a few years ago to show how I insert a zipper for the top of a pouch, and honestly, even though I’ve learned a lot of new techniques in the past 5 years, that method is still pretty much my go-to choice when it comes to sewing zipper pouches.  The results will give you a great finish with no dented corners.  My biggest pet peeve when it comes to zip pouches is dented corners.  

Dented corners – the very bane of my existence…  This is one of my very early zipper pouches, but thankfully I learned how to avoid this, and I promise you can too!

See…nice, crisp corners with no dents.  So much better!

The only things I have changed from my tutorial above is to use Wonder Tape in place of pins & basting and I only topstitch the lining.  The biggest secret to avoiding dented corners is simply to keep your zipper out of the side seams.  Use zip ends or fold your zipper over at the start & keep them at least 1/8” inside your seam allowance.  The space between the zip end won’t be big enough for anything to fall out, but it will give your pouch the room it needs to have nice straight corners.

When I use Wonder Tape to baste my zipper to the lining and exterior pieces, I just put one piece on the top edge of the right side of the lining, place the zipper wrong side down centered & matching up the edges, put another pieces of Wonder Tape along the zipper tape, then place the exterior on right side down.  If you are questioning whether you have everything layered in the correct order (it’s sometimes hard to remember if the lining or exterior should be against the right side of the zipper {hint – it’s the exterior!}), just fold both pieces back away from the zipper & see how it will end up.  As long as you are careful with it, the tape will hold your sandwich while you double check your placement.  I still have to do this from time to time when I start over-thinking the process or haven’t done it in a while.  Then simply stitch along the edge (making sure to stop & move the zip pull!) with about a ¼” seam allowance.  

Here the pink is my exterior (right side up), zipper is already held in place right side together with the exterior using Wonder Tape, and my lining is ready to go on right side down.  The white strip is the Wonder Tape before removing the backing.

The other change I have made, which I already mentioned, is to only topstitch the lining to the zipper.  Personally, I find this step extremely important to keep the lining from getting caught in the zipper.  Some people have luck with just pressing away from the zipper, but I’d rather take the extra step to keep from getting a stuck zipper.  Instead of folding both the lining & exterior away from the zipper, wrong sides together and stitching through both (as shown in my tutorial above), pull the exterior up and out of the way, then from the lining side, topstitch about 1/8” away from the edge, stitching the lining to the zipper tape.  This will keep your lining from getting stuck in the zipper, but allows the exterior to still lay flat and away from the lining during the step when you sew up the pouch.  This means you have less bulk in the corners and they will push out nicely.  If you prefer the look of topstitching on the exterior, you can stop/start your topstitching at the same point where your zipper ends (remember, keep it out of your seam allowance!), then fold only the seam allowances to the lining side when sewing up the sides.

This is the lining of the same pouch above.  You can see there is topstitching to help keep the lining from getting caught in the zipper.

And the exterior, with no topstitching.

Then just sew up the sides, matching up the exterior pieces rights sides together and lining pieces right sides together & sew around the outside (please remember to open your zipper first!!!).  

Different pouch, but same method.  Top is the lining side, you can see that by only topstitching the lining to the zipper, the exterior and interior are both able to lay nice & smooth at the zipper (where the double line of dark stitching it), so there will be no bunching.

The above pouch completed and turned out.  No topstitching on the exterior, and even though that top band is glitter vinyl (and therefore less forgiving than cotton), I was still able to achieve nice corners.

Another great resource from Dog Under My Desk is this tutorial on sewing a perfect zipper tab.  Personally, I know it’s sometimes hard to get a bag wrangled in a decent position without leaving a super long zipper tail, so I prefer these zip ends from Emmaline Bags these days.  You can never go wrong with a little extra bag bling!  

Honestly, I could probably go on and on, but I think I’ve rambled enough.  If you have any questions about anything I’ve shared, please don’t hesitate to ask.  I am always happy to help whenever I am able, or point you in the direction of someone who may be able to help if I can’t.  You can find more of my ramblings (though, thankfully, not as lengthy…lol…) over on Instagram.  Just shout if you need help! :)


IITBS--Giveaway From Sew Sweetness


Today's giveaway is brought to you by Sew Sweetness. Sara is the creative genius behind Sew Sweetness. The Sew Sweetness pattern shop offers a wide range of patterns for all levels of bag makers and each pattern is full of step by step instructions and photos to build your confidence and your skills. I started sewing Sara's bags right after I started sewing and being able to complete her bags gave me the confidence to keep going and make things I never thought I would have the skills to.


The Annex Double-Zip Box Pouch

The Emblem Duffle Bag


The Reisende Bag


In addition to her pattern shop, Sew Sweetness also offers high quality bag making hardware and the most amazing cork fabric!! Sara is also the author of two books: Big City Bags & Windy City Bags, a Craftsy instructor, has designed two fabric lines for Art Gallery Fabrics and is the co-organizer of Sew Pro.

Sara is a creative rock star! Despite all the time she puts into designing, teaching and organizing, Sara is ALWAYS willing to help out anyone who has questions or comments about her patterns or products and is so encouraging and helpful to everyone! Her blog is full of tips, tricks and tutorials for bag making and beyond and for the past several years she has hosted Purse Palooza, which is a fun event in which features pattern reviews and giveaways throughout the entire month!

You can follow Sara on Facebook, Instagram, Twitter and join the Sew Sweetness Patterns group on Facebook for inspiration or support.

For today's giveaway Sara is offering.....(drumroll please)........ a 5 pack of Paper Patterns of her latest releases:  The Annex Double Zip Box pouch, The Tortoise Bag, The Reisende bag, The Emblem Duffle and one yet to be announced.


Also Sara is offering her Craftsy class, Building Better Bags


This class is designed to take all the mystery out of choosing and using various interfacings and stabilizers. She can show you the right materials to get the results you want. This is a perfect class for anyone who want better and more predictable results from their bags and interfacings. 


One lucky winner will receive Sara's Craftsy class and a 5 pack of paper patterns of her latest patterns. 

Wednesday, August 3, 2016

IITBS-- Margareth of Maggie Made Bags on how to Press for a Professional Finish


Today's guest blogger is Margareth of Maggie Made Bags. I became a fan after seeing all the GORGEOUS bags she shares over on Instagram. I am always blown away by the professional looking bags that she creates and how quickly she can put them together!! I'm so honored that Margareth agreed to guest post for the series, and that she chose pressing. A crisp pressing job can make your bag go from homemade to WOW in just a few minutes. Check out some of Margareth's gorgeous bags:


Thanks again Margareth!!

......................................................................................................................................


Hi there! I am Margareth and I caught the bag-making bug some six years ago. Since then I have sewn a shedload of bags and tested many bag patterns for some very talented designers. You can find my makes on Instagram @maggiemadebags https://www.instagram.com/maggiemadebags/
I’d like to thank Cyndi for inviting me to write my first ever blogpost! I feel honoured to be included in this awesome Bag Maker series.

Today I would like to talk about one of the crucial parts of bag making: pressing.
Yep, I wrote it down in bold. I know it’s not sexy and possibly one of the boring parts of bag making. But, pressing your bag is vital to achieve a nice, professional looking product. After all, considering the effort and hours we’ve put into prepping and sewing, we don’t want to end up with a frumpy looking bag! And, pressing is important in all stages of bag making, starting right off before you even cut into your material.  Pressing helps with flattening bulky seams and correcting small pucker and it will make your bag look sharp.
By the way, pressing is not the same as ironing I learnt! When ironing, you slide the iron back and forth in a smooth motion. Ironing can stretch your fabric, which is probably not the result you’d want. By pressing you move the iron in a rather up and down movement instead of back and forth.

So, what will you need? Apart from a good steam iron, I use some handy dandy tools to press my bags: a (cotton or linen) kitchen towel and a bath towel! The kitchen towel is my ‘pressing cloth’ and a rolled up bath towel acts as my ‘pressing ham’.  Of course, you’re free to use the real McCoy here (or even make the ham yourself), but the towels work fine for me. I like to use the pressing cloth on top of the wrong side of faux leather and vinyl, you really don’t want to press straight onto the right side of these materials. Also, if my fabric tends to go shiny when pressed, I use the pressing cloth.

Now, start by unfolding your material and giving it a good iron (this is the stage where you may iron the fabric!) with some steam. Steam is your friend when using quilting cotton! Try to get those pesky folds and wrinkles out, yes I know, it will all be wrinkled up again while sewing and turning the bag inside out. However, a smooth surface will help you achieve accurate parts when cutting your fabric. I may even use some starch here.

Next, if you’re using fusible interfacing, you will press that onto the wrong side of your fabric.
Check the manufacturer’s instructions on the best way to adhere the interfacing to the fabric. I think it’s important to let your interfaced parts cool off before you start sewing. Usually, I will cut and interface later in the day or in the evening and let the pieces cool off and continue sewing the next day. I’ve found that if I don’t let the interfaced parts cool off enough, the interfacing tends to come off again while sewing.

Then go ahead to the fun bit and start sewing your pieces together. Now ideally, you would press every seam that you’ve stitched. However, I am both lazy and impatient, so if I can get away with finger or nail pressing at this stage, I’ll certainly opt for the latter! It is important to always press pockets and flaps and in general any part that will need topstitching. Pressing your seams will make them nice and flat and you can even press away small puckers. Use the tip of your iron and some steam.

I press my seams open to achieve crisp defined lines and to make sure that the bag exterior and lining pieces will fit nicely together. Sometimes you should press to a certain side instead of open, particularly if you will be topstitching that seam. I feel that topstitching looks nicer if it’s done on top of some ‘bulk’. A good pattern will always give specific instructions.


The seam is pressed to reduce bulk and to prepare for topstitching.

Finally, you have finished sewing the last seam and turned your bag the right side out. So onto the most crucial part, pressing your bag into shape! Sure, you could just give your front and back a nice press trying to get the last wrinkles out. What you should be doing though is properly shape your bag. Again, I like to use lots of steam to set the shape.

Pull the lining out of the bag and press out the wrinkles. Push the lining back into the bag, put your hands in and push the lining into the bottom corners and smooth it straight.  Actually, put your arms up while doing this, gravity will help the outer bag fall nicely on top of the lining. Next, place your iron into the bag and press the side and bottom seams.
Then press your exterior front and back. To shape the bag further you will need to press the exterior side and bottom seams. If your bag opening is too small to fit the rounded end of the ironing board in, place your pressing ham (or rolled up towel) in the bag against the seams and press. Be careful not to burn yourself while doing this.


My bath towel was too large for this pouch, I used my rolled up ‘pressing cloth’ as a ham. Press the bottom using your pressing ham in the pouch.

For a lot of bags this should be sufficient, but if you want to create a sharp and crisp shape take it one step further. In the next photos you will see how I shaped a more rounded pencil case into a crisp rectangle.


Notice there is no stitched seam that I could follow, so I manipulated a fold.  Shape the pouch with your fingers in the desired form, lay it down on the ironing board and press the fold with steam.


Continue shaping and pressing around all sides of the pouch , by either following seams or creating folds. It is important to use steam to help set the shape. Use the tip of your iron and take care not to place the entire iron on the fold. This can cause creases where you don’t want them.


Before and after. Left: The larger pouch is more rounded and not pressed into a particular shape. Right: Both pouches are shaped into a crisp boxy form. (Pattern by Sew Sweetness affiliated link http://sewsweetness.com/?wpam_id=26)


Here is an example of a weekend bag I pressed into a boxy shape. The bag has only a few seams that I could follow, but by manipulating and pressing folds I achieved this boxy appearance. (Pattern by Sew Sweetness affiliated link http://sewsweetness.com/?wpam_id=26)


And another pouch I just had to press into its boxy shape! (Pattern by Aneela Hoey)


Well, I hope you found these tips useful and I’d like to thank Cyndi once again to include me in her Bag Makers series. Do come back tomorrow for more handy tips on how to better your bag making skills and do come and say ‘hi’ on Instagram https://www.instagram.com/maggiemadebags


IITBS- Two Pretty Poppets Giveaway


Today's giveaway sponsor is Two Pretty Poppets. Two Pretty Poppets features patterns for practical everyday handbags. Lisa is the designer behind Two Pretty Poppets, she is a life long sewist but started sewing more when she began making handmade clothes for her daughters. She found her love of bags when she couldn't find a pattern that didn't have exactly what she wanted so she designed the Insulated Lunch Bag and the rest of her amazing patterns followed. 

The most recent release was the Feature Me Everyday Tote, which if you follow along on Instagram, you will see hold endless possibilities for designs and is perfect for showcasing everything from your most hoarded fabric print, embroidery or even a small paper piecing. 


I also love the Adventure Time Backpack, it's perfect to sew up for you little as they had back to school soon! You can also follow along with the sew along for this bag here


In addition to her beautiful patterns, Lisa has an incredible blog with great content for bag lovers! The Two Pretty Poppets blog features tutorials for bag making, tips, interviews with other makers and my favorite, the Hardware Heaven Series. 


In this series, different types of common bag making hardware is explained and the whole process is demystified by her clearly written tutorials for using them in your bags for professional results. Check out this series here

One lucky winner will receive three pdf patterns of their choice from the current patterns in the Two Pretty Poppets shop. Good luck, finding just three that you want :)


Connect with Two Pretty Poppets to get lots of inspiration, helpful tutorials and see the latest pattern releases:

Instagram: @twoprettypoppets
Pinterest: @twopretty


Monday, August 1, 2016

It's in the Bag! Better Bag Making Series Schedule


I'm so stoked to announce the It's in the Bag! Better Bag Making Series schedule. The kick off is on Wednesday August 3rd, so come back to read all the tips and tricks from master bag makers and to enter each day's giveaway!


The Line Up: 

Wednesday August 3rd: 
Margareth of Maggie Made Bags: Pressing for a professional look

Thursday August 4th: 
Bree of My Crafty Crap: Zipper tips and tricks

Friday August 5: 
Crystal of The Cloth Albatross using QAYG for bags

Saturday August 6th: 
Amber of Roarhaus: Bag Hardware

Sunday August 7th: 
Reece of Happy Okapi: Tools used in bag making 
Katherine of PfitzSewSwell: Managing curves and an alternate method to turn your bag

Monday August 8th: 
Cindy of Raspberry Sunshine: Handbag straps 
Wendy of W.D. Handbags: Using your domestic machine to get professional results

Tuesday August 9th: 
Jenny of Sincerely Jen: Sewing with Vinyl
Marci of Marci Girl Designs: How to handle issues with bulk 


Each day there will be a giveaway from one of our amazing sponsors!!! So come back and check out the awesome tips our bag making gurus are offering and enter each day's giveaway! Additionally Sewing Patterns by Mrs.H has generously offered a 25% off coupon for patterns in their pattern shop with NO minimum purchase, so now is your chance to go pick up a few of the gorgeous patterns there! Use code: MAKINGBETTERBAGS at checkout. 


I'd like to thank our generous sponsors again for being a part of this series! These designers are absolutely amazing and so supportive of others. They were more than willing to be a part and I'm so humbled at their generosity and support! These ladies are truly invested in helping others build their skills and confidence while inspiring others. I mean it when I say it, they are genuinely just all around awesomesauce.

The Giveaways: 


August 3rd: 


3 individual PDF patterns from Two Pretty Poppets


August 4: 


Building Better Bags Craftsy Class by Sara Lawson of Sew Sweetness & a 5 pack of paper patterns
 of her newest designs


August 5:


3 individual PDF patterns from Blue Calla Patterns


August 6:


25 dollar store credit from Emmaline Bags


August 7:

3 individual PDF patterns from Sewing Patterns by Mrs. H


August 8:


30 dollar store credit from Chris W Designs


August 9:


3 pdf patterns from Swoon Patterns


Friday, July 29, 2016

It's in the Bag--a Better Bag Making Series

Happy Friday!! I am so excited to announce the It's in the Bag! series, a blog series devoted to building skills and confidence specific to bag making. We have some incredibly talented bag makers who will be tackling some areas that people are challenged by when making bags. I am so honored that they have agreed to be a part of the series. 

The crazy talented lineup of contributors:

Crystal of the Cloth Albatross
Amber of Roarhaus
Margareth of Maggie Made Bags
Katherine of PfitzSewSwell
Jenny of Sincerely Jen 
Wendy of WD Handbags
Reece of Happy Okapi 


As if the all star line up of contributors wasn't enough, there will be a giveaway each day of the series from the following generous sponsors:


Additionally, Sewing Patterns by Mrs. H will generously be offering a coupon code worth 25% off for the series. The code will be announced along with the schedule, so watch for more details soon!! You will not want to miss the topics and all the incredible giveaways these amazing designers have offered!