Welcome back! Today is our 5th and final day of the sew along. We will be making our lining and putting it all together, so you will have your completed Luxie at the end of the day, yay! Let's get sewing.
Assembling the Lining pieces:
If you find that your machine struggles to sew the PUL or vinyl, a walking foot can be super helpful. You can also use that annoying paper that comes with your interfacing between your presser foot and your fabric to help glide it along.
First, we are going to sew the bottom edge of our lining pieces together. don't forget to leave about a 7' hole along the bottom seam for turning your bag (don't short yourself here on making sure the hole is large enough, there are a lot of layers to fit through the tuning hole. Remember PUL is a knit fabric essentially so you don't want to use too short a stitch length or your stitches might pop when you go to put your bag together. I like to use about a stitch lenth of 3 when contstructing the lining, maybe it's overkill but better safe than sorry. (later when you sew your exterior and lining together you won't have to worry about things shifting so much, but the stretching is especially true when you are turning your bag, so also be SUPER sure to securely back stitch at each stop and start).
We will attach the side pieces to our main lining panels the same way we did our exterior bag. I am not ashamed to admit I like clips, and a lot of them. I probably would put clips on my clips if I could. Remember, if you are using PUL you want your SHINY side as your right side. This way, your bag lining is wipeable. If you aren't concerned with wipeability feel free to use whatever side you like.
Once we have stitched on the sides, your completed lining panel should look like this:
Yay!! Now we are going to put everything together!
Attaching the lining to the exterior:
Clip your lining to your exterior right sides together, aligning your side seams.
Clip carefully, there are a lot of layers here you don't want to have shift around. Using a walking foot can be helpful here if you have one.
Once you have stitched your lining to your exterior, it's time to turn your bag right side out. Using that hole you left in the bottom of your lining, gently coax your bag through.
There are a lot of layers so sweet talk it, give it encouragment and don't be afraid to smush when needed. Smushing is a very important bag making skill.
Woohoo! We have almost completed our bag, it looks like a real bag now! Before stitching your lining hole closed, I like to do one final look over to make sure that the bag was behaving in while we were sewing that last seam. I always check to make sure that it wasn't tricky and shifted around and that I have everything stitched as it should be around that top edge. Once you are sure that your bag has behaved, pull your lining back up and we need to close the hole that you left for turning:
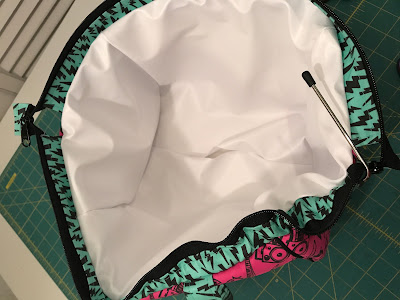
Now push your lining back down inside your bag.
If you would like to, you can top stitch the top of your bag below the zipper casing. I don't find this worth the trouble, as I don't think it's necessary and as Janellle indicates in the pattern it's a pain to stitch through all those layers neatly and you are also adding more holes that make your lining less waterproof.
Adding the frames:
OUR LAST STEP!!! Still with us? This is the easiest part of the whole project. Remember the ends of your casing you left unstitched? This is where we are going to insert your frames. Just slide it on in, easing your casing around it as you go. Your frames should have caps on the end, leave those on because they will keep the ends of your frame from rubbing against your fabric.
Push it through, moving your casing along as you go.
Once you get the frame in, adjust as necessary. One side down:
Repeat for the other side and you are done! You have completed your Luxie and doesn't she look lovely????
Admire your fancy new bag and get ready to have the coolest lunch bag at work or school. Thanks for joining! Don't forget to share your completed bag to be eligible to win our giveaway!
Miss a day? No worries! Catch up with the previous days here:


2 comments:
Well done sew along, Cyndi! Found your supplement info and photos quite helpful.
I'm doing my lining...iron on vinyl on cotton. Did you clip your corners to ease in? I'm scared to.
Post a Comment