Showing posts with label fabric. Show all posts

Thursday, October 12, 2017

The Bag Buzz 10/13/17


Welcome to the Friday the 13th installment of the Bag Buzz! Read on to catch up on the latest pattern releases, new products, sales, tutorials and more!

*This post may contain affiliate links.

New Releases:

The FREE Sunshine Wristlet from Bagstock Sewing Patterns

No automatic alt text available.


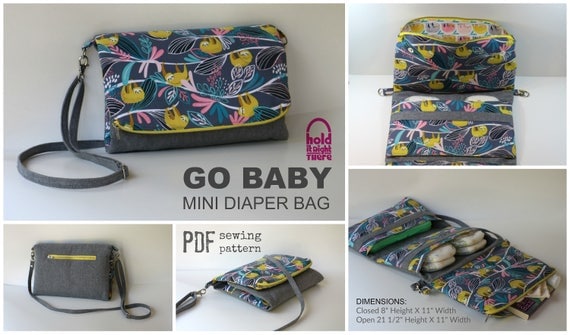
The Go Baby Mini Diaper Bag by Hold it Right There Bags:


Craftsy Class: The Cross-Body Bag: Sewing with Waxed Canvas. 


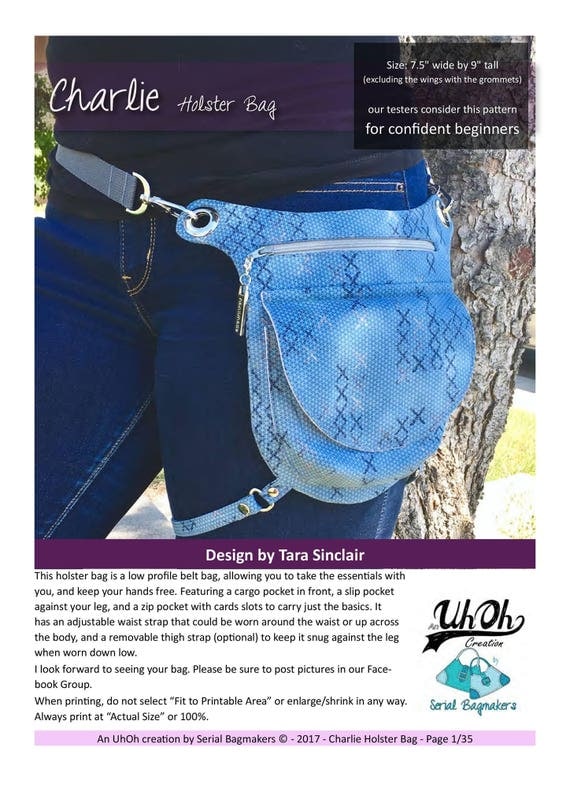
The Charlie Holster Bag Pattern by Uh Oh Creations: 

The Myles Work Bag by iThinkSew


Sales:

Emmaline Bags is currently underway with their 5th annual snow sale! Use code SNOW2017 at checkout.

No automatic alt text available.


Giveaways:

Enter to win a Copy of Stitched: Sewing organizers and a pack of Aurifil Thread


Hawthorne Threads is Giving away a fat quarter bundle of Michael Miller's Llama Navidad:


Joann Fabrics is giving away a 100, 250 and 500 gift card. The fine print here is that you need to sign up through facebook and opt in to text messages or email.


Craftsy is giving away mystery stash boxes


New Products:

I'm dying to try the new Easy Strap Anchors from Emmaline Bags!! Available in 5 finishes: 

No automatic alt text available.


Also, if you are swooning over the new irridescent finish, metal bag labels are now available from Emmaline Bags:

Image may contain: text


Other News:

Chris W Designs has just released a video to accompany her Bodacious Bowler Bag, perfect who like a little more of a walkthrough when sewing bags. 
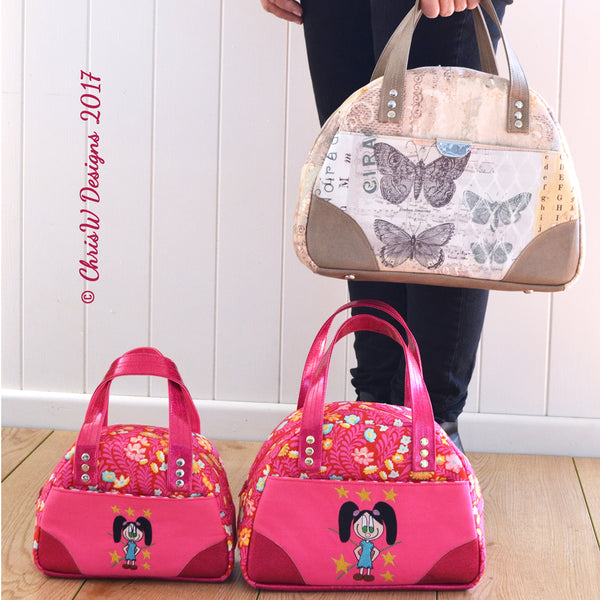
Bodacious Bowler

Mrs. H has now released her patterns in PAPER format!! So for those of you who prefer paper patterns with beautiful color photos and more durable paper to cut the patterns from, this perfect for you! 
The Fiesta Tote Paper Pattern


Saturday, January 18, 2014

Fabric and the Bubonic Plague of 2014

I'm almost ashamed to admit that I haven't as much as touched my sewing machine yet this year. It's not for lack of inspiration, or lack of fabric. You see, I think I have contracted the Bubonic plague, or a really nasty sinus infection but either way I don't want to do anything but sit in PJs and feel sorry for myself.

It's a shame really, I've had so many goodies in my mail box over the past week.


So many possibilities, so little energy. I hope it comes back soon, there is still more coming! So many amazing fabrics, I can't wait to cut into them.


Thursday, October 3, 2013

Master bedroom on a budget


It turns out mattresses are expensive, it was a good thing my husband and I had decided that we wanted to downsize to a queen for our next bed anyway. Holy Moly have you been mattress shopping recently?! Since we previously had a king, we had to buy all new bed linens.

Time to head to Target. I had nothing particular in mind, and I found this little gem on a clearance end cap. (How much do I L.O.V.E. Target's clearance?! The red sticker said 20.45---are you kidding? I couldn't get it in my cart fast enough


Since this was just a duvet I had to buy a comforter to go with it, so I opted for a lightweight down alternative one for 24 bucks. As for sheets, I cannot live my life with 200 thread count sheets. I ran across these 400 thread count sheets marked down to 30 bucks for the set simply because they were out of the package.  I also found a similar set in gray at Gabrielle Brothers for 9.99. Yes, please.


Next up, I had to tackle the curtains. I had previously made a pin tucked duvet cover from some sheets (thank you Pinterest), while the duvet turned out well, the curtains I had made to match did not. They looked like I had bed sheets hanging from my windows. Everyone insisted they did not, I only thought so because I knew they were made from sheets but I couldn't get them down fast enough.

To make these curtains, I took 4 and 1/2 yards of coordinating fabrics from my stash (read: free), and cut each yard into four 9" strips, with the exception of the half yard of the teal fabric, I cut that into six 3" strips. It just so happened that the 44" width of the fabrics was a perfect length for the curtains. I just arranged how I wanted the strips to go, sewed them together, hemmed the sides and bottom and turned the top down a couple of inches so I could slide the curtain rod through.


For the wider panels, I used 4 of the 9 inch strips and 2 of the 3" strips. The window above our bed is MUCH smaller, so I only used 2 of the wider pieces and one smaller piece per panel.  The sizes worked out perfectly. 


I still had 4 of the strips left over so I used those to recover the throw pillows I already had. 

I decided that, in addition to the gray, I wanted some pops of turquoise and red (I adore these colors together!) So how better to pull in the red than a little embroidery on the pillows?

I got to try out one of my new favorite items, Pellon's water soluble embroidery stabilizer. It's printable, so you can run it through your printer and just stick the sheet with the pattern on it, directly onto the fabric you are using. It worked like a charm, you can use it on darker fabrics that otherwise may be difficult to transfer the pattern on and it saves you the hassle of tracing more complicated patterns. 


Just like the package claimed, the entire sheet melted away under some running water and a little agitation by me. I let the fabric air dry, ran a hot, dry iron over it and sewed up an envelope cover for one of my existing throw pillows (why buy new ones when I can just update the old?).


I underestimated how much smaller a Queen bed is, and how much extra room we would have in the bedroom. Our room is TINY and a smaller bed works really well in the space. However, it seemed like there was too much open space so I went rug shopping. I found this 5 x 7 rug for 16.98 at Ollie's. Score. 


I'm really happy with how it's coming together. The grand total spent has been right around a hundred bucks!!! Yay Bargain shopping!!


Sunday, July 7, 2013

Fabric covered buttons = magic

Last winter, I discovered fabric covered buttons and we've had a love affair since.  Sadly, I haven't had as much of a use for buttons as I'd like. 

Now I can get my fabric covered button fix!!! Earrings... This is a hopelessly unoriginal project and I think I've seen it pinned a gazillion times so I can't even give the proper credit but that doesn't make me love them any less!!!

I saw the buttons on clearance at a local sewing warehouse store for 3.00 per ziplock BAGFUL!! I'm now kicking myself for not buying the hell out of them. 
I've made about 10 more pair of these, and I seriously can't believe how easy they are!!


Sunday, February 24, 2013

Hexies


I can never leave well enough alone. Just when I seem to have enough things to fill my brain and my time, I start something new. Enter hexies.

These awfully cute fellas are deceptively addicting. I sat down with some paper hexie templates and a couple tutorials right after the holidays but quickly put them aside for other projects. At that time, I didn't see what all the fuss was about. Sure they were great scrap busters but much too time consuming.

Then one of my favorite things in the world came back, The Walking Dead. Yup, I'm a complete sucker for zombies and I look forward to Sunday nights like a kid longs for Christmas. I'm that dork. The show has movie like suspense and to keep my palms safe from my fingernails I must have something to do with my hands. I usually crochet but right now I'm infatuated with knitting. Unfortunately, I'm also not very good at knitting and it requires a lot of concentration for me still. The solution to this dilemma? Hexies! 

My hubs is having knee surgery tomorrow, so my day will consist of a lot of time sitting around. I'm hoping I can start sewing these together into something potentially useful. I've tried various conglomerations of placements and I think I like the random the best. Maybe I'll just start sewing them up and see hoe it turns out! What they will end up as? I have no idea yet!